11/25: The Dutchmogul Method
Hey, everyone. Dutchmogul here, back with a new post for November.
I’ve been doing a ton of painting this month, what with finishing up all the cultists and MEAT work (so much red), and prepping for a big December OpenTactics set, and all of that has made me want to devote this entry to talking about my process. I get a lot of questions about my approach to painting 3d printed miniatures and I figured this might be a good opportunity to touch on that (at least until I find the time and energy to make a proper video). So, let’s get into it….

How to paint okay (like me)
First off- I’m an okay painter. A serviceable one who paints to get models on the table and ready for a steady (and seemingly never-ending) stream of promo shots. I have no aspirations (or delusions) of becoming a Golden Demon-level painter or anything, and that’s okay. In this hobby, the biggest hurdle can be liking the very thing you spend your time creating. I’ve been painting miniatures for nearly 40 years now (yikes), and while I’m always on the lookout for new techniques and ways to improve, I’ve found a happy balance between speed and quality that works for me. There are lots of great techniques out there, but this is what I like to use.
SOME THOUGHTS ON SPRAY PRIMER: I’ve been painting traditionally sculpted miniatures since the olden days, back when they were made of lead (though the move to pewter/white metal came not too long after I started). As such, I’m certainly no stranger to spray primers. I still pick up the odd plastic, resin-cast, or metal model, so I always have a can on hand. That said, since I mostly paint my own designs these days, and those are all 3d printed, I rarely use the stuff.
In my own experience, there is no need for black spray primer if you’re printing in black material. Black PLA and black resin (at least the matte variety of resin we use here) takes paint like a champ. If you generally prime things black before you paint, the material has already done that work for you. If you use the stuff, I’m sure you don’t need a list of reasons why cutting that part out of the process would make things easier (and so, so much cheaper and less toxic). I’ve been painting this way for over a decade, and there has been no discernible downside or difference with primed models.
Step 0: the Sculpt
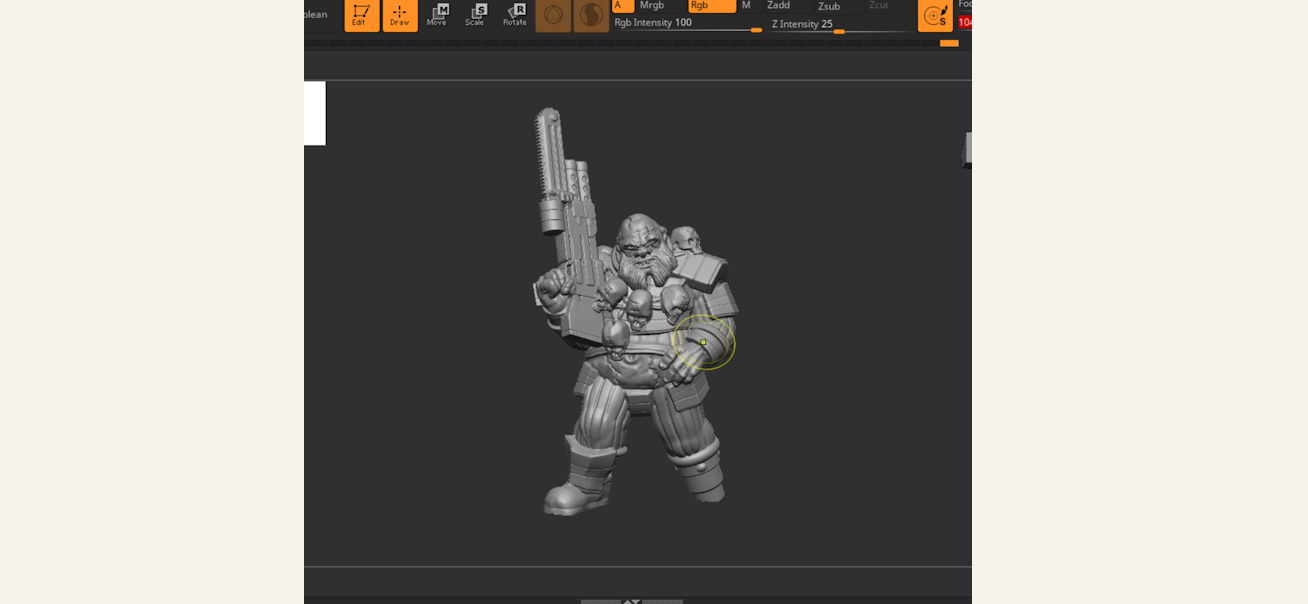
To start, I sculpted a model that I needed for a New Dominion campaign on which I’m currently working. I did this part in the morning. The model was made in Zbrush, modifying an existing design to go with a faction theme (ogre mercs). The whole process (design to paint) happened over the course of a single day, and I’ll elaborate on times where relevant.
Step 1: Printing

Designed for support-free printing, I printed the ogre on the Prusa Mini I use for prototyping using slightly modified stock settings (.10mm) with a stock nozzle. Can I do better? Yes, absolutely. We even have a machine set up in the lab for maximized FDM detail, but I like to print any design I make in something that’s immediately accessible and see what I can do with those settings. This was printed in matte black PLA (Overture brand), and I was really happy with the results. The whole print took around 3.5 hours. That ran in the afternoon while I played video games (an indispensable part of my process). I don’t always use the blue painter’s tape, but I tend to drop it when I’m printing miniatures. (Better safe than sorry.) I didn’t glue the model to the base, I just rested him on there for effect throughout the process. (I do the base gluing at the end.)

Step 2: Drybrush Priming (Darkest)
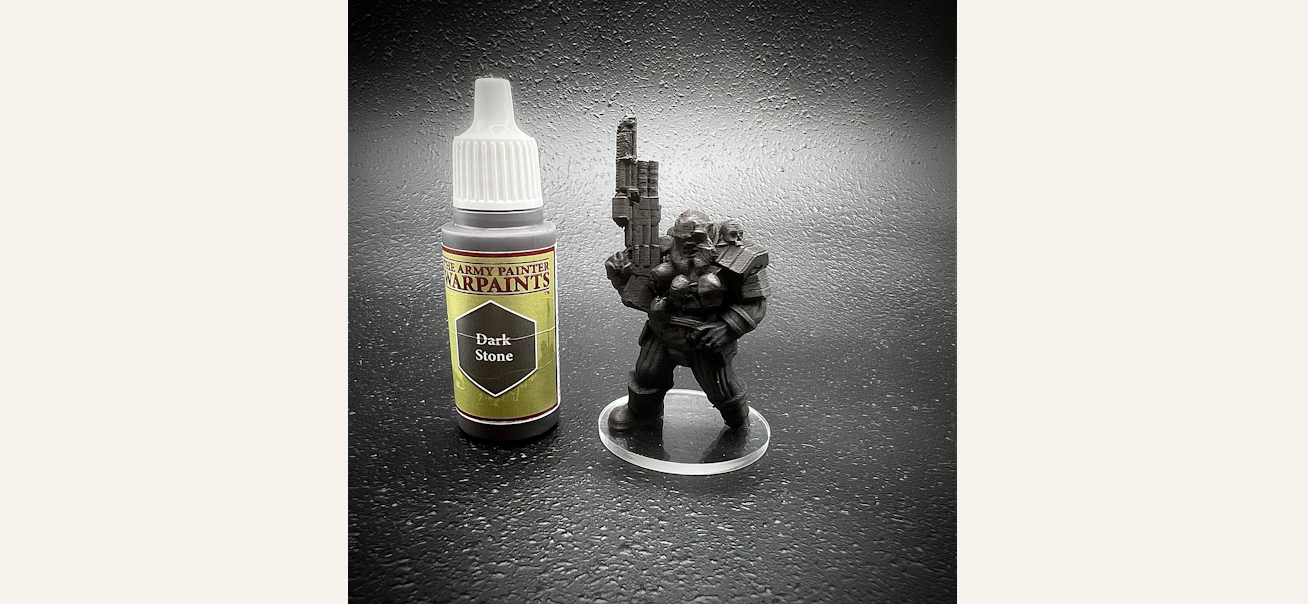
Most of the time, I use a medium grey tone and then a white for these steps. I wanted to take my time with this one, and I used a formula that I’ve found can lead to a sort of warmer overall tone. It adds a couple of extra steps, but not really much in the way of time (especially if you’re not batch painting). I started with a quick and super-sloppy drybrush of Dark Stone (Army Painter). I really like this slightly brownish grey, and use it for undertones on all kinds of things. This first drybrush step (whether you use this or a medium grey or whatever) is all the “tooth” you need for the rest of your paints to find purchase, and it will be finished in a manner of seconds (not minutes).
Step 3: Drybrush Priming (Lighter)

Next up in the priming phase, I did a lighter (but not so light) drybrush of Monster Brown (Army Painter). This is what’s standing in for grey in the standard speed paint prep. I love this color and use it constantly, as you might imagine.
Step 4: Drybrush Priming (Lighter Still)

In this extra step, I did a light drybrush of Brainmatter Beige (Army Painter). I sure love this color (and we’ll use it again before we’re done). To me, this does half of the usual white’s work, with adding just a touch of warmth to the process.
Step 5: Drybrush Priming (Lightest Yet)
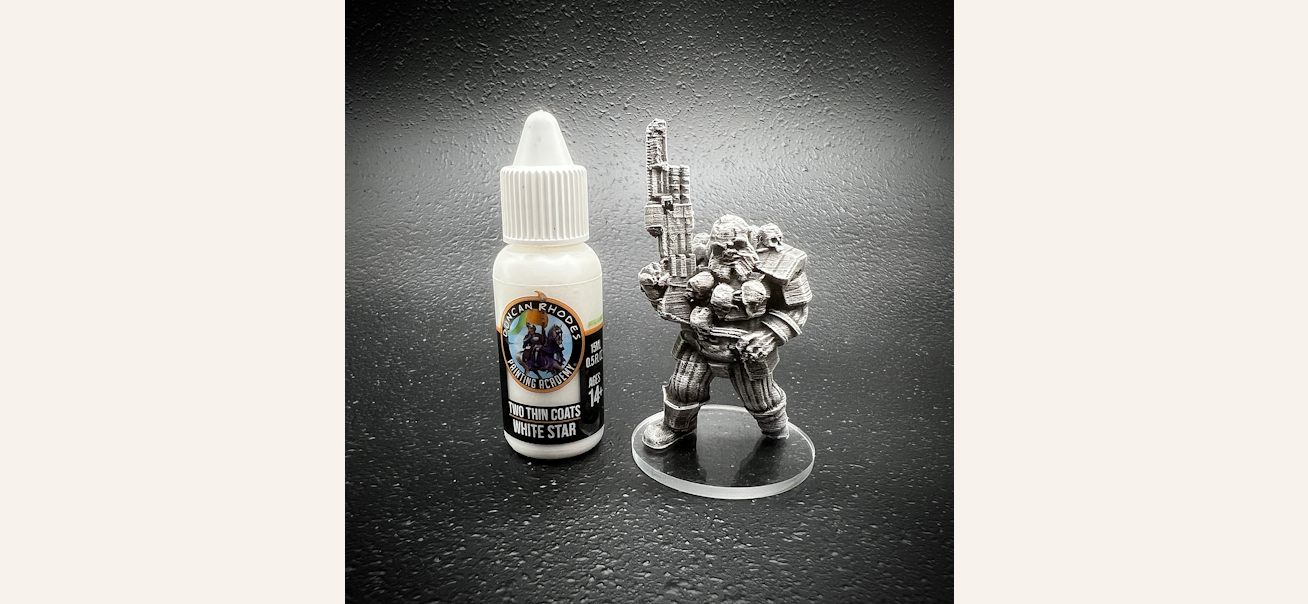
For this final step in the priming process, I use a very light drybrush of a standard white, White Star (Two Thin Coats). This brightens the model up and gives us our topmost highlight points. Of special note: I don’t wash my brush between these drybrushing phases, letting each shade blend slightly into the next. I do whisk the brush across some paper get rid of excess paint, but it doesn’t take a dip until I’m done. All four stages I used for this one (or the standard two) don’t take long enough for the brush to get gunky (again, unless you’re batch painting).
Step 6: Speed Paint (Light Brown)
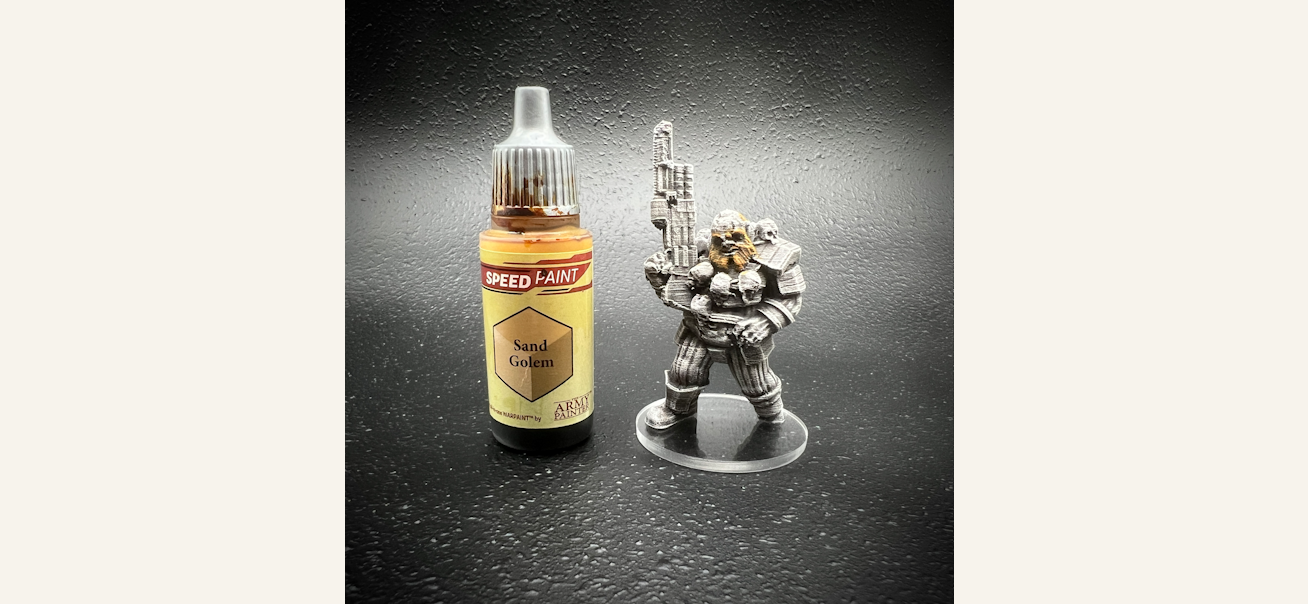
I’m not sure I can give you definitive advice on which speed paints to apply in which order, as it seems to change model to model, but I do generally prefer to do the lighter shades first. Starting off, I used Sand Golem (Army Painter) to color his beard, eyebrows, and what little hair he’s got partying in the back of that dome. In retrospect, I sort of wish I had gone grey, but oh well! I’ll do that with the next version I paint. (Probably in resin next time.)
Step 7: Speed Paint (Bone White)

Next up, I used a Pallid Bone (Army Painter) on the trophy skulls. It’s always amazing to me how well these colors contrast when next to one another, even when you might think they would blend together.
Step 8: Speed Paint (Dark Brown)
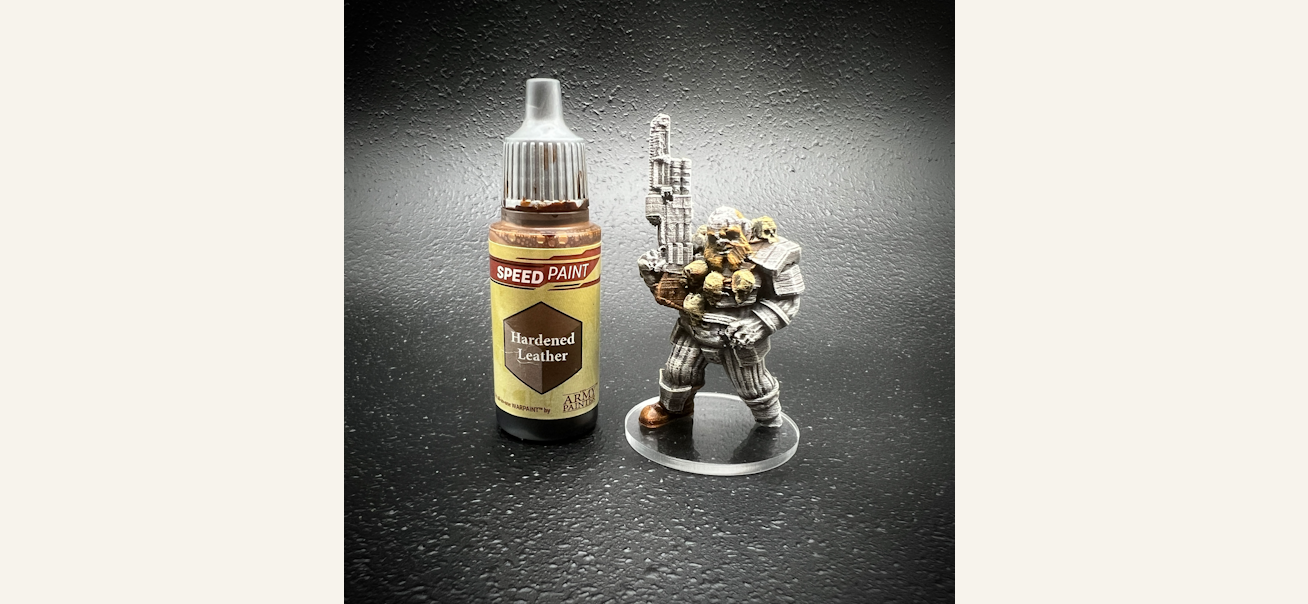
Hardened Leather (Army Painter) was then applied to his boot (singular) and the leather straps strung between the skulls. I also used it on the gun stock and the two pouches on his back belt region. (They’re back there, I promise.)
Step 9: Speed Paint (Skin)
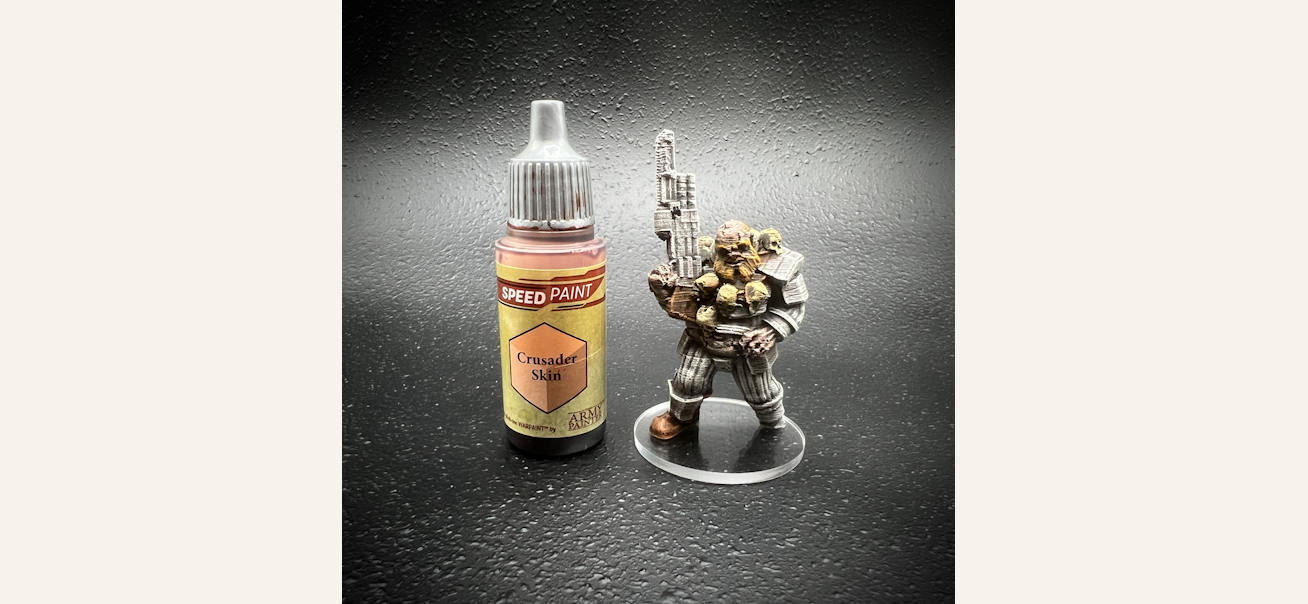
This felt like a good time to tackle the flesh with Crusader Skin (Army Painter). I might normally tackle this step first, especially with lighter skin, but the relative position to other parts getting lighter colors made sense to me for this stage.
Step 10: Speed Paint (Gold Undertones)
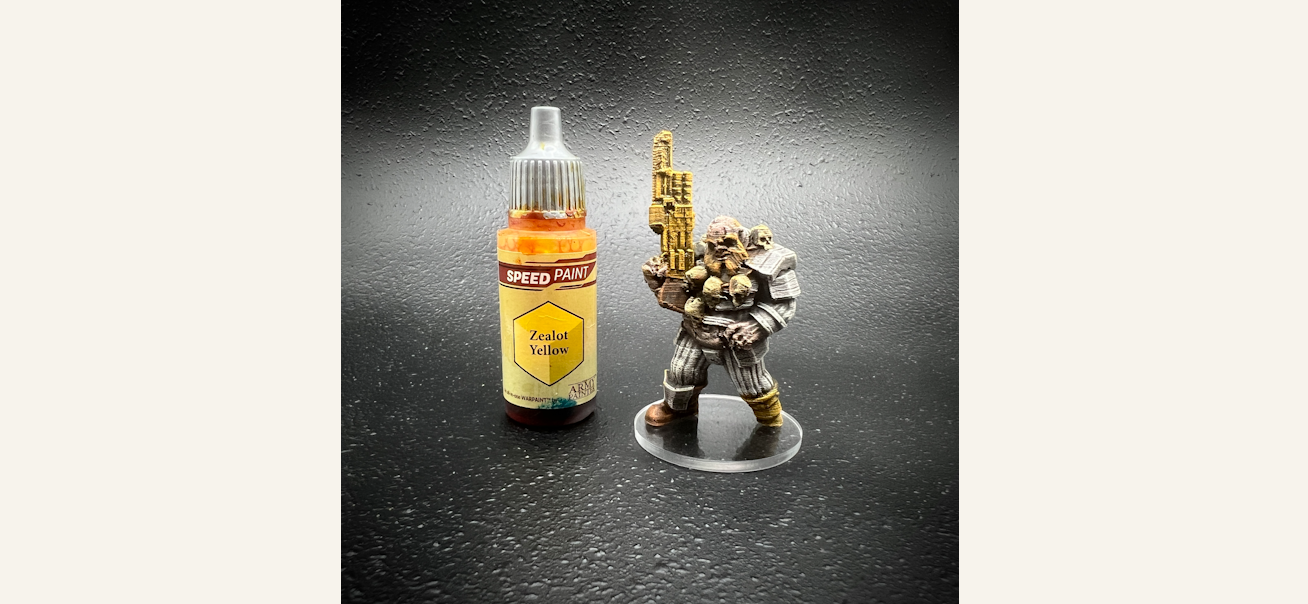
I wanted this guy to blend in with the other Mytho-Resistance models that I’ve painted, who all use a garish gold for their weapons/knick-knacks. I’ve found that Zealot Yellow (Army Painter) really works great for bringing out the metallic golds (which we’ll dryrbush on later), so I applied it to his gun and peg-leg. (A spacefaring ogre of this caliber should hobble in style, I think.)
Step 11: Speed Paint (Orange)
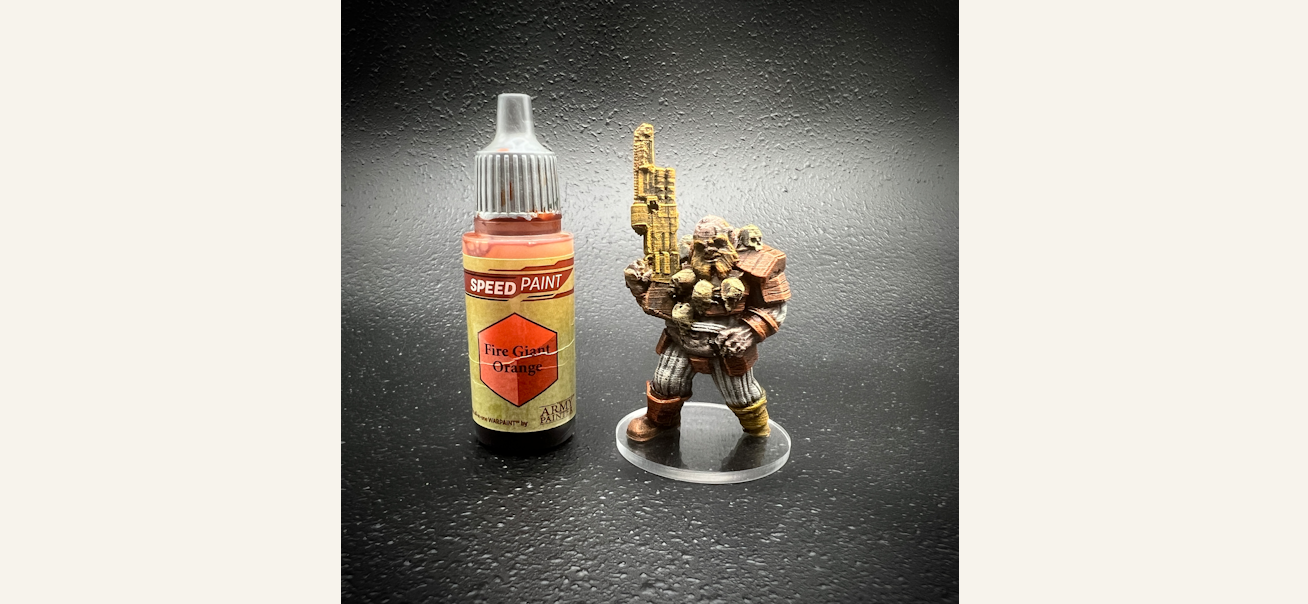
Next up, I applied Fire Giant Orange (Army Painter) to the broad surfaces of the merc’s impact armor plating. This is one half of the black & orange theme of my “Knights of Samhain” Mytho-Resistance rebel cell.
Step 12: Speed Paint (Black)
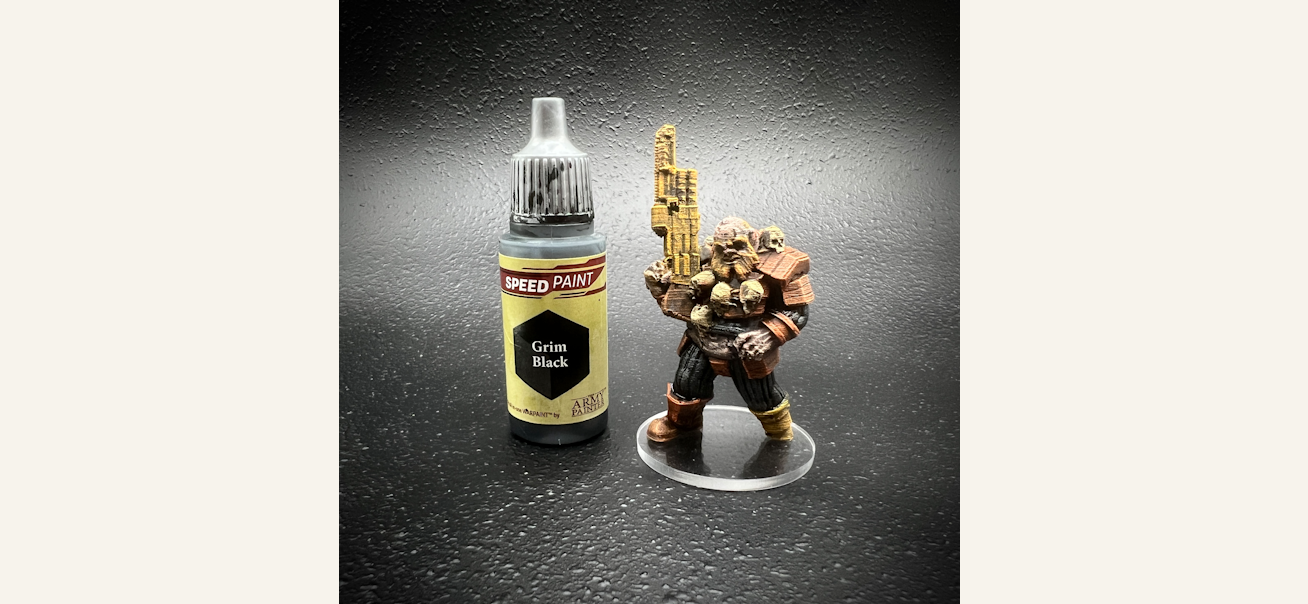
As the final speed paint step, using Grim Black (Army Painter), I painted the fabric-ish elements of the impact armor’s flexible weave, finishing off the very “Halloween all the time” vibe.
Step 13: Standard Paint (Darker Metallic Gold)
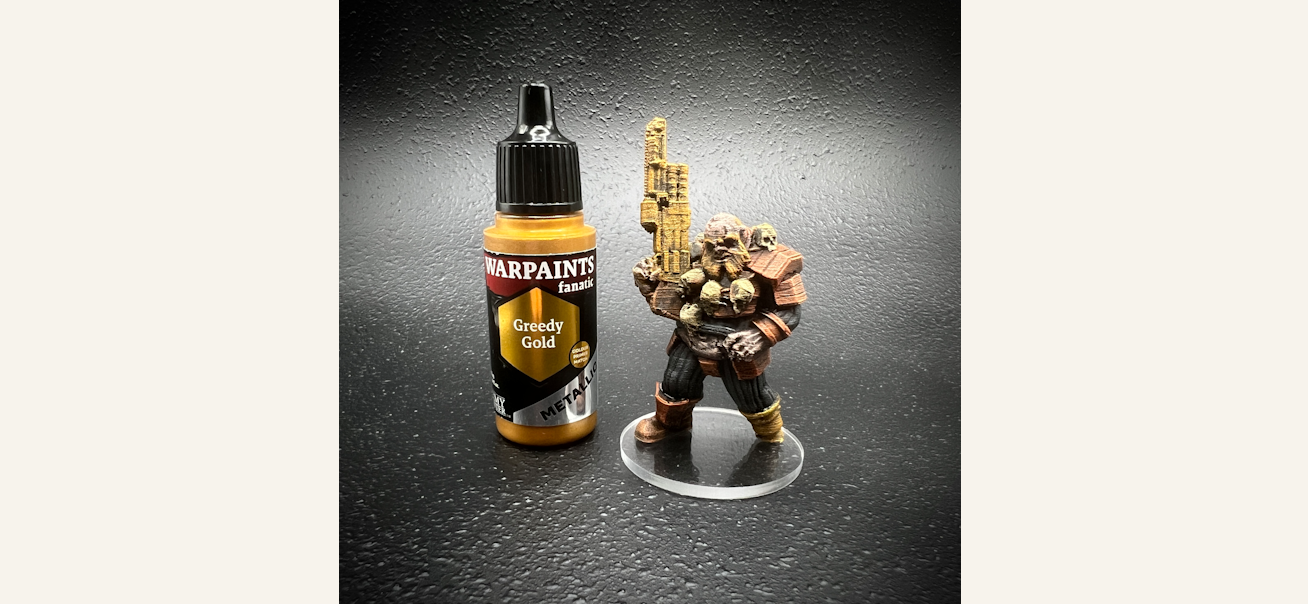
With the speed paints finished, I started in with a few quick steps to finish the piece. First up, a modest drybrush of Greedy Gold (Warpaints Fanatic) over the yellow regions.
Step 14: Standard Paint (Skin Highlights)

Next for our pasty, spacefaring ogre, I gave the skin regions a light drybrush of Pale Flesh (Vallejo).
Step 15: Standard Paint (Skull Highlights)
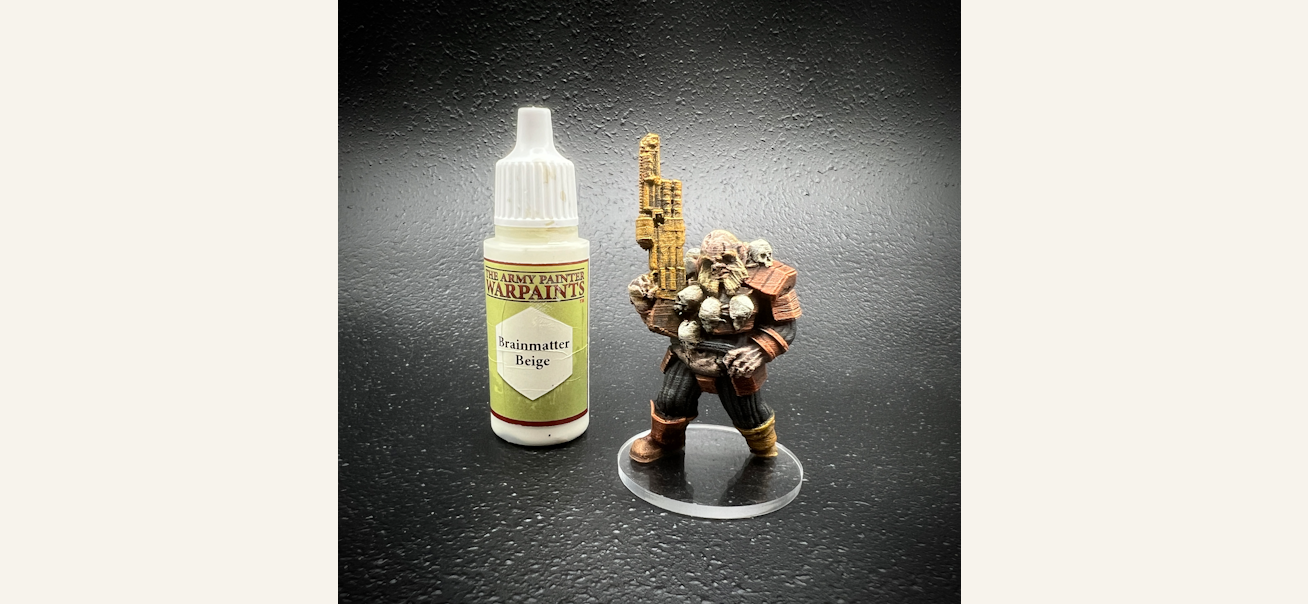
Aaaaand back to Brainmatter Beige (Army Painter) to lighten the skulls and his his teeth (with a much smaller brush). I also did a very light brush over the beard.
Step 16: Standard Paint (Lighter Metallic Gold)
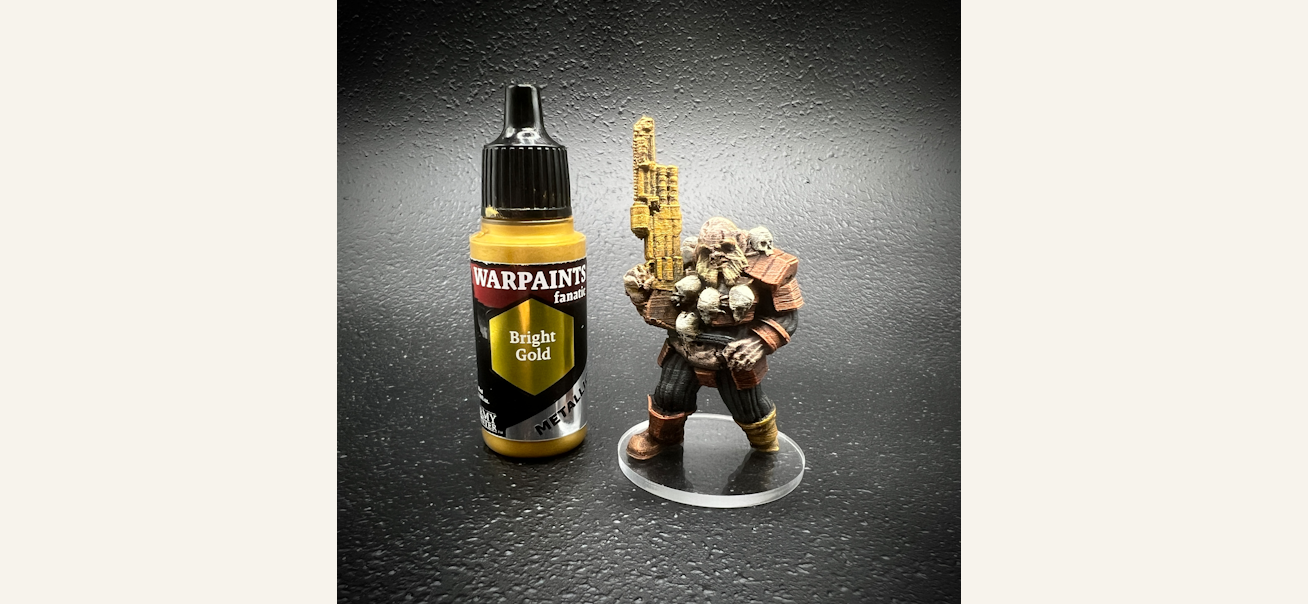
Finally, a light drybruush of Bright Gold (Warpaints Fanatic) to make the gun and peg-leg pop a bit, and that’s it for painting.
Step 17: Basing

For the final step, I glued him to that 40mm clear acrylic base and let him join his fellow Mytho-Sapiens in the fight against the New Dominion. I won’t go deep into bases here, but I will say that I love, love, love these clear acrylics. I always preferred something neutral as possible, and that used to be laser cut MDF disks with some minimal textures, but switched to clears a few years ago and never looked back. I’m sure you have your own preference, and there’s no wrong way to go really (unless you’re using dinner plates or something), but for my own preference, I like this functionally necessary space beneath my characters to be as unobtrusive as possible. I really like a good scenic base for a display piece, but for models that get table use and move around between a lot of different landscapes, these really appeal to me. I also sort of love the effect of a “field of influence,” like it's their turn in a tactics video game.
As for finishing steps, I know some people swear by clear sealant, but I have never found a use for it. Outside of metal miniatures (which will, aggravatingly, chip and bare their naked metal eventually no matter what you do), plastic models (and especially 3d printed ones) just don’t lose paint. I’ve never had an issue with this in all the years I’ve been 3d printing my models, and I regularly pile them on top of one another in boxes like an absolute heathen.
And there we have it. This guy isn’t going to win any painting competitions, but his character is conveyed, he’ll look good on the table with his fellow miniatures, and he’ll service the story I want to tell. At the end of the day, this is what’s most important to me.
So there you have it. To summarize the phases:
Print in black PLA or resin (matte resin works best).
Drybrush on your primer for speed paints (medium grey then white works great).
Apply speed paints.
Paint on some highlights if you like.
OpenTactics Preview
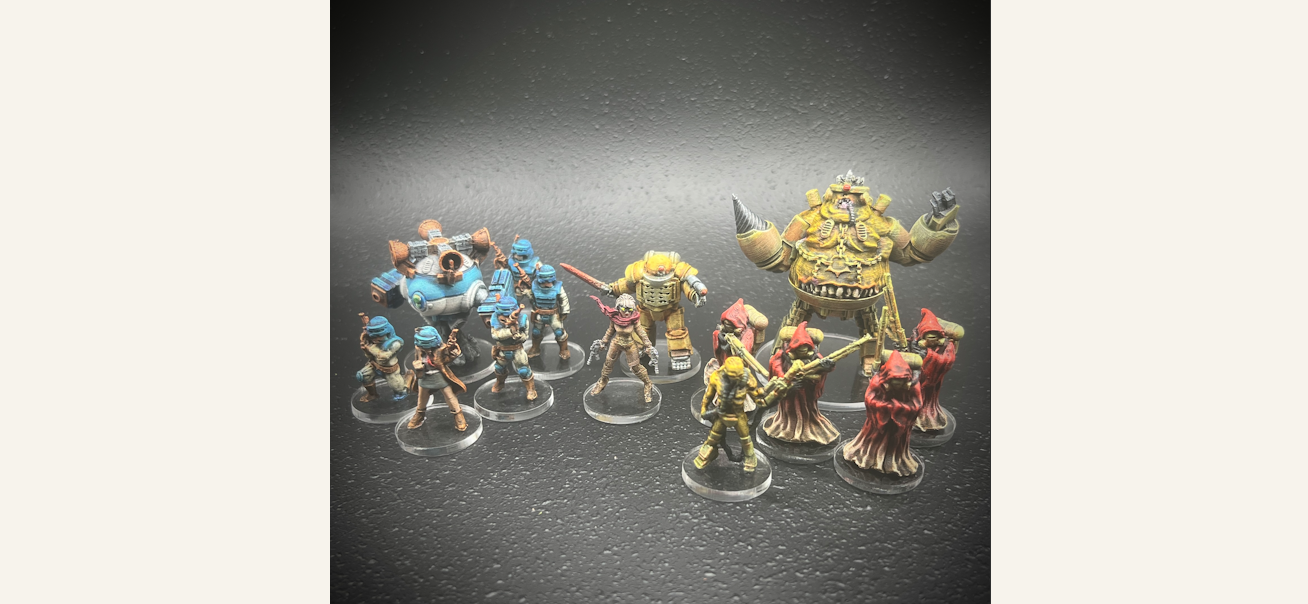
With the paint tutorial out of the way, here’s a quick look at what’s on the workbench. We’re currently working on a couple of big starter sets for our OpenTactics skirmish rules. These will adapt our New Dominion range for the system, along with some other factions from the Wayfarer multiverse. Pictured above are two factions (painted using my usual process) coming to our monthly supporters in December (along with an absolute ton of modular terrain). We’re getting really close to going public with the free OpenTactics rules, and all of our Streets of Plasma stuff will be getting in on the revisions.
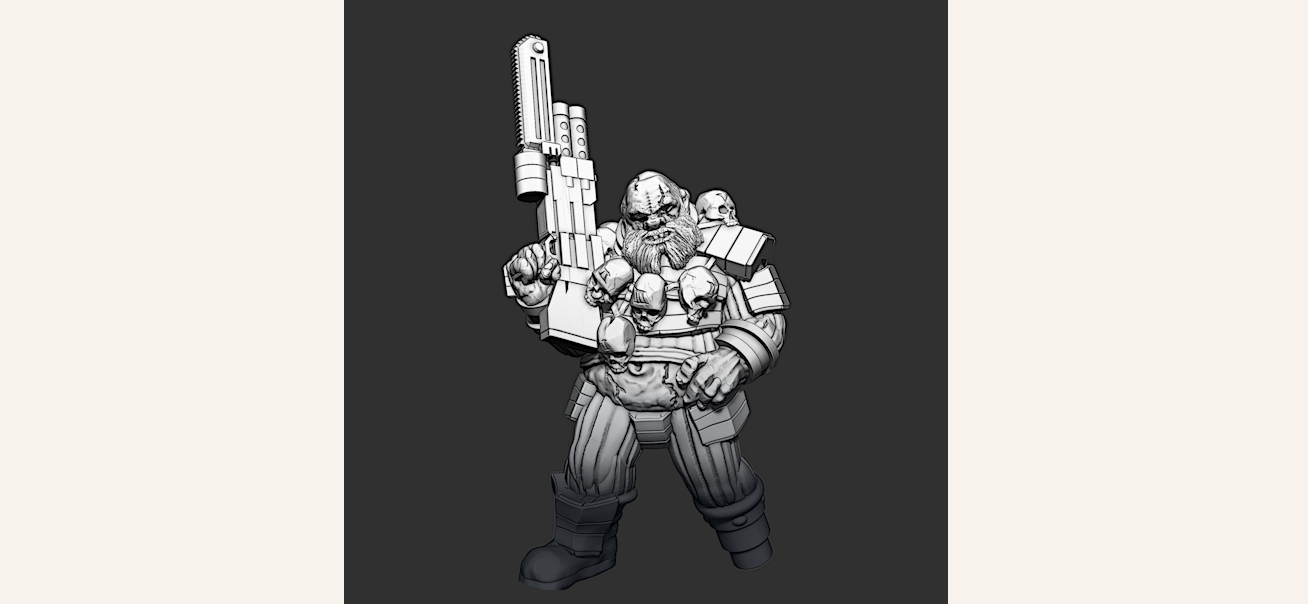
November Free Miniature: Ogre Privateer
And, without further ado, here’s the free miniature for the month, the Ogre Privateer featured in my painting tutorial.
Thanks for reading, and if this was at all helpful, please let us know. I’d be happy to do more tutorials if there’s demand for it, whether that’s sculpting, 3d kitbashing, junk-building, scanning, or any of the other hobby elements in which we regularly engage. Happy gaming, folks,
Dutchmogul and the Ill Gotten Games team